Prime Focus - Initial Images
I still had the scope set up inside at the sliding doors, and having 3D printed the prime focus adapters, the first one I wanted to try was the 2" one.
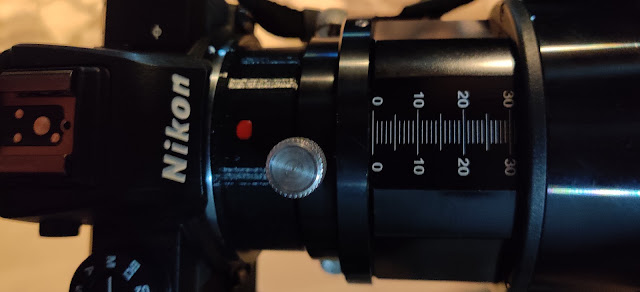
I attached the it to the camera, fully inserted the nose into the 2" adapter on the focuser and switched the camera on, hooked up the USB to the laptop opened AstroPhotography Tool [APT] and put it in LiveView.
I started moving the telescope focuser from end stop to end stop and almost immediately I started to see stars appearing on the screen. The position reading was around 32-33mm on the focuser.

I took a few shots with the camera to help dial in the focus and within only a handful of short exposures I was getting pretty clear focus.

Next, I set up a plan in APT to take 200 exposures of 15 seconds and store them on the laptop, and started off the run. I configured SharpCap to pull the images from the folder, and perform an align and stack, and initiated the LiveStack.
As each image was captured, I could see the pixel adjustment needed to align the images and it was following a relatively smooth line, so things appeared to be working.
The following morning I took all the single images from that run, and re-ran them through SharpCap and then did some basic post processing to adjust the colour curves and crop out the worst coma aberration affected stars, and this is what I ended up with.

The previous night after having done the main run, I started to just randomly move the scope around and take a single exposure of whatever it landed on. In one of the images, I managed to capture a trail from a satellite or another object passing through the exposure. You can see it in the upper half of the image, a line running across the image.

You can see some of the other single exposure grabs done further down.
By now, my only battery was running low, I only have the one camera battery, and don't have a dummy battery that allows a permanent power supply, and the camera cannot take full power from its USB port unfortunately. I need to get another battery and a dummy, but difficult to get hands on them, and the suppliers that do have batteries are charging a small fortune. I guess being a new model camera, with a new battery type, then the clones and copies are not on the market yet, and the dummy batteries not available yet.
I setup on another star, and ran a small 30 exposure stack and then the battery went dead. Here is the output from that run, however it only managed to align 27 of the images and binned the other 3.

And that was the end of the session due to battery life.
Overall I was amazed at how much more stars you can see through the prime focus, and how quickly I could dial in the focus.
The Coma Aberrations are still very noticeable around the perimeter of the images. The other thing to note is that the images are very large, after all it is a 20 MP camera, both in pixel dimensions and file size, and if I capture in RAW which is recommended for the stacking and post processing, then the files can be into hundreds of megabytes.
I still haven't really looked into the post processing yet, so images are still all over the place in terms of colour etc.
Anyway, I am very pleased with how the first prime focus session went.
So, what is still on the cards?
a) Coma Correction
b) Plate Solving
c) Prime Focus using the 1.25" and the Barlow magnifiers.
d) Start hunting down some nebula!
e) Post processing
f) Probably a lot of other things!
To close, here are some other single exposure images grabbed that evening, with some basic post processing


I attached the it to the camera, fully inserted the nose into the 2" adapter on the focuser and switched the camera on, hooked up the USB to the laptop opened AstroPhotography Tool [APT] and put it in LiveView.

I started moving the telescope focuser from end stop to end stop and almost immediately I started to see stars appearing on the screen. The position reading was around 32-33mm on the focuser.

I took a few shots with the camera to help dial in the focus and within only a handful of short exposures I was getting pretty clear focus.

Next, I set up a plan in APT to take 200 exposures of 15 seconds and store them on the laptop, and started off the run. I configured SharpCap to pull the images from the folder, and perform an align and stack, and initiated the LiveStack.
As each image was captured, I could see the pixel adjustment needed to align the images and it was following a relatively smooth line, so things appeared to be working.
The following morning I took all the single images from that run, and re-ran them through SharpCap and then did some basic post processing to adjust the colour curves and crop out the worst coma aberration affected stars, and this is what I ended up with.

The previous night after having done the main run, I started to just randomly move the scope around and take a single exposure of whatever it landed on. In one of the images, I managed to capture a trail from a satellite or another object passing through the exposure. You can see it in the upper half of the image, a line running across the image.

You can see some of the other single exposure grabs done further down.
By now, my only battery was running low, I only have the one camera battery, and don't have a dummy battery that allows a permanent power supply, and the camera cannot take full power from its USB port unfortunately. I need to get another battery and a dummy, but difficult to get hands on them, and the suppliers that do have batteries are charging a small fortune. I guess being a new model camera, with a new battery type, then the clones and copies are not on the market yet, and the dummy batteries not available yet.
I setup on another star, and ran a small 30 exposure stack and then the battery went dead. Here is the output from that run, however it only managed to align 27 of the images and binned the other 3.

And that was the end of the session due to battery life.
Overall I was amazed at how much more stars you can see through the prime focus, and how quickly I could dial in the focus.
The Coma Aberrations are still very noticeable around the perimeter of the images. The other thing to note is that the images are very large, after all it is a 20 MP camera, both in pixel dimensions and file size, and if I capture in RAW which is recommended for the stacking and post processing, then the files can be into hundreds of megabytes.
I still haven't really looked into the post processing yet, so images are still all over the place in terms of colour etc.
Anyway, I am very pleased with how the first prime focus session went.
So, what is still on the cards?
a) Coma Correction
b) Plate Solving
c) Prime Focus using the 1.25" and the Barlow magnifiers.
d) Start hunting down some nebula!
e) Post processing
f) Probably a lot of other things!
To close, here are some other single exposure images grabbed that evening, with some basic post processing


Comments
Post a Comment